
You’ve just sliced a bunch of scallions for tonight’s stir-fry, and there it is on the chopping board: a little fistful of white stubs with a beard of roots. It feels wasteful to bin it. And you’ve seen the photos of onion ends sprouting in a jar on a windowsill, so you wonder whether the trick really works or whether it’s just one more kitchen hack that fizzles out.
Short answer: Yes, you can regrow green onions from the root ends you’d normally throw away. Stand the white bases, roots down, in a little water on a bright windowsill, keep the water fresh, and new green shoots usually appear within about a week. Water alone gives you a few thinner harvests; plant the bases in potting mix and the same onions can keep producing for months.
By the end of this guide you’ll know exactly where to cut, how to set up the water and soil methods, how many harvests to realistically expect, what to do when the water turns slimy, and the one food-safety habit that matters more than any growing tip.
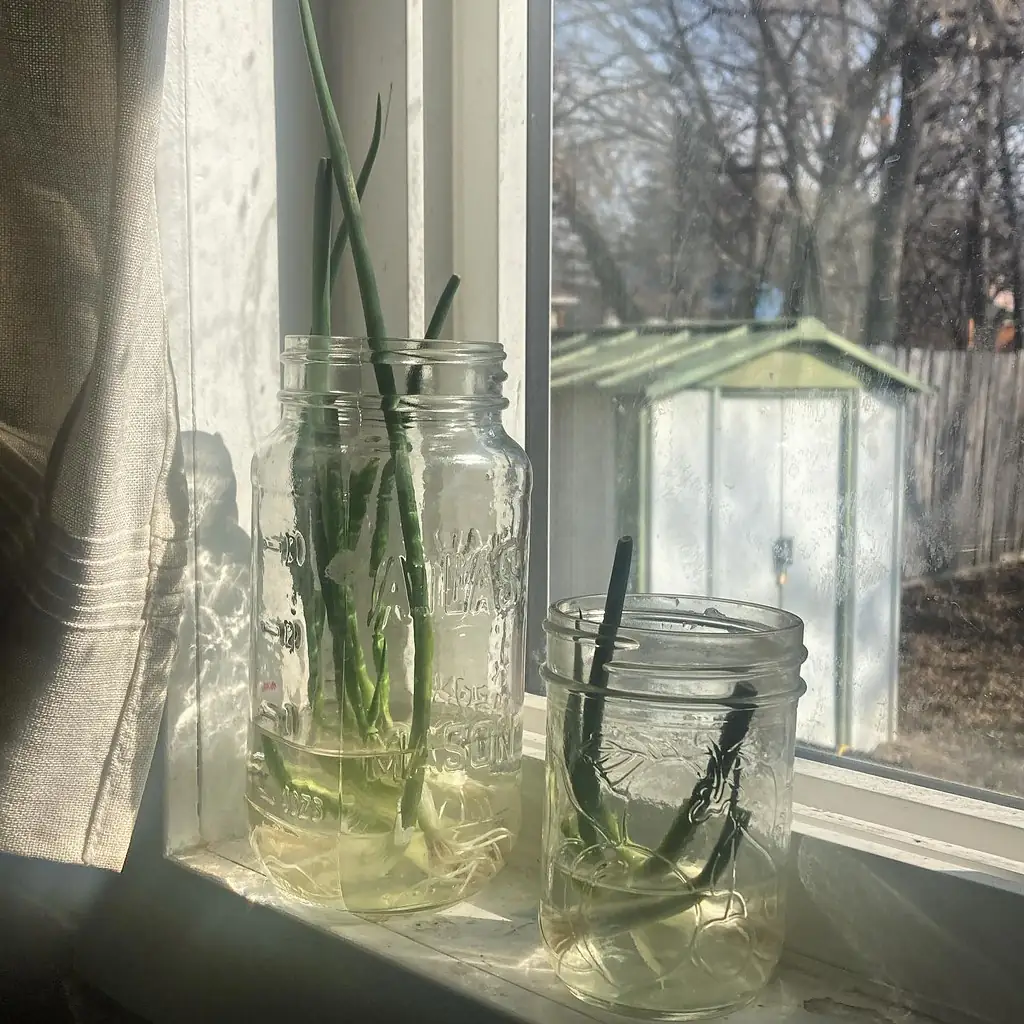
Why You Can Regrow Green Onions From Scraps
Here’s the part most hacks skip: the green onion you buy isn’t a dead vegetable. It’s a whole young plant that was pulled from the ground, roots and all. As long as the base and roots are intact, it’s still alive and ready to grow.
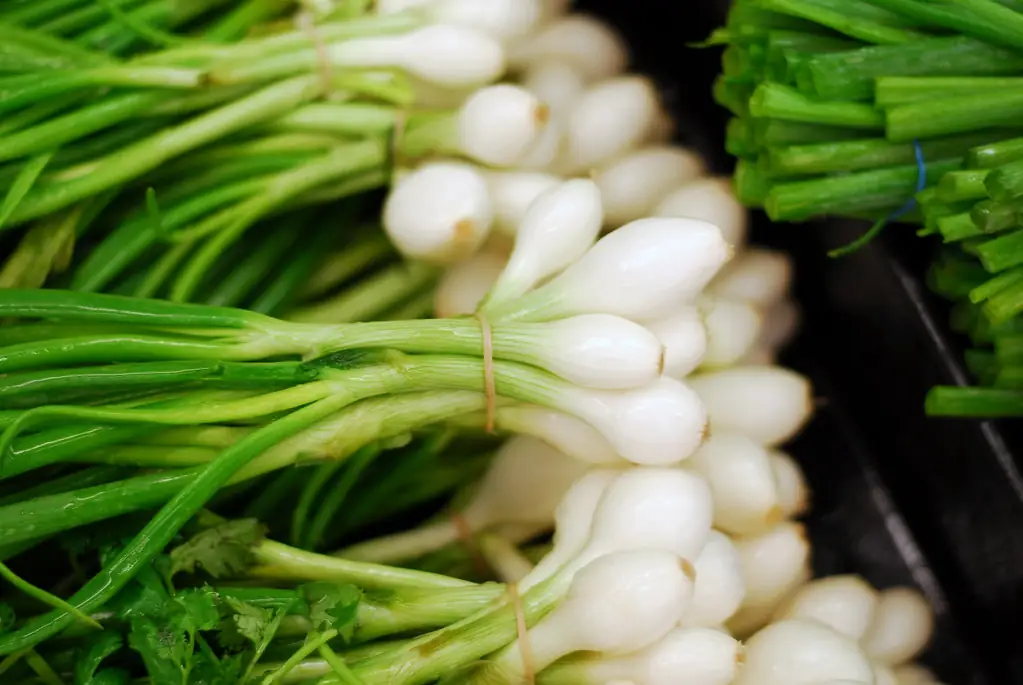
Green onions (also sold as scallions or spring onions) are either young common onions, Allium cepa, or bunching onions, Allium fistulosum, a type that doesn’t form a big bulb. Either way, the growing point sits low in the plant, on a flat disc of stem tissue called the basal plate, right where the roots attach. New leaves are produced there and push upward through the old leaf sheaths. Cut off the green tops, keep the basal plate and roots, and the plant simply carries on making leaves.
That’s also why it works so fast. The white base holds stored sugars, so the first flush of regrowth is fuelled by the plant’s own reserves rather than by anything in the water. Extension educators at the University of Illinois and Washington State University both describe the same basic method: keep the bulb end with roots, set it in water, and harvest the greens as they come back.
What you need
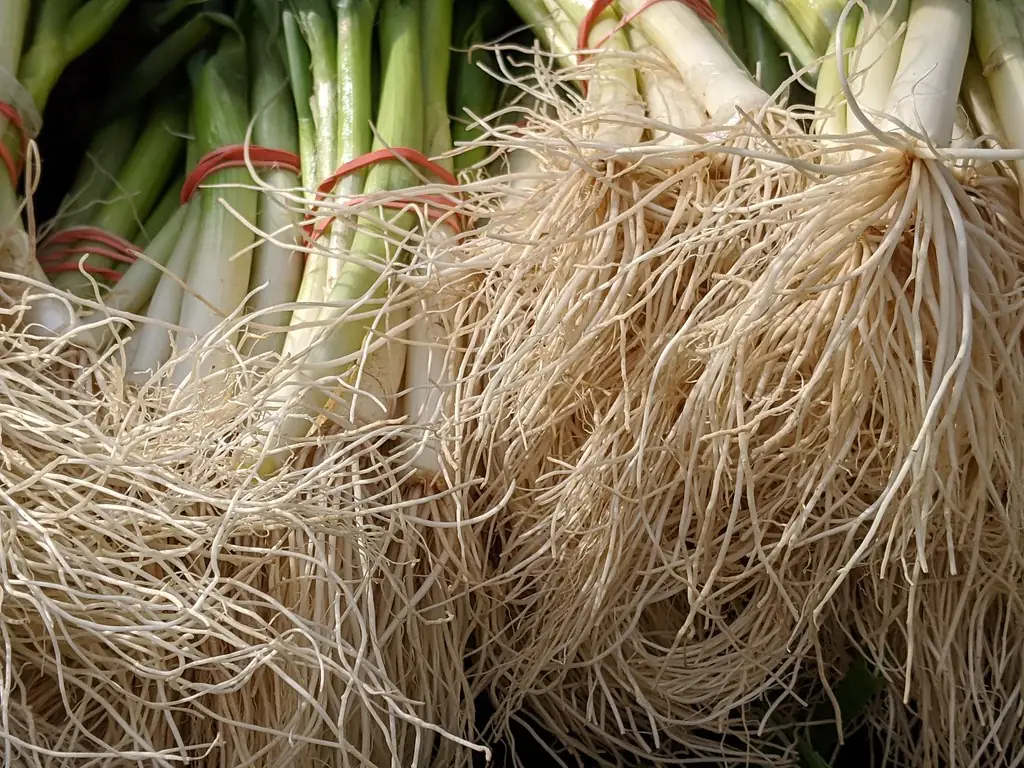
- A bunch of green onions with healthy, white roots still attached (the fuller the root beard, the better).
- A narrow glass or jar, so the bases stand upright.
- Water, preferably unchlorinated (more on that below).
- A bright windowsill, or a small grow light in winter.
- Optional: a 4–6 inch (10–15 cm) pot and ordinary potting mix, for longer-lasting plants.
Numbers to Hold Before You Start
Regrowing scraps is forgiving, but a few figures make the difference between a jar of lush greens and a jar of floppy, smelly stubs. Every number here comes from an extension publication or a peer-reviewed study listed in the Sources.
| What | Target | Source |
|---|---|---|
| Time to first new shoots | About 6 days | UC Master Gardeners, Solano Co. |
| Time to full regrowth in a warm house | About 1 month (water method) | UC Master Gardeners |
| Time to regrow in a cold, unheated space | Slower; under 2 months in a cold winter greenhouse | UC Master Gardeners |
| Cut green onions when tops are | About 6 in (15 cm) tall | Virginia Cooperative Extension |
| Cool-season leaf growth range | 45–60°F (7–16°C); onions grow well in cool conditions | Virginia Cooperative Extension |
| Light | Sunny; green onions tolerate partial shade | Virginia Cooperative Extension |
| Soil pH (if you pot them) | 6.2–6.5 | Virginia Cooperative Extension |
| Water | Avoid chlorinated water; keep it fresh and topped up | UC Master Gardeners; WSU Extension |
| Grow-light example from research | 82 µmol/m²/s for 12 h/day (hydroponic ‘Koba’ green onion) | ASHS 2024 abstract |
Notice what’s not in that table: a fixed number of harvests. No university trial has measured how many times a supermarket root end will regrow, because it depends heavily on the root condition, the light and whether the plant gets any nutrients. We’ll come back to that honestly in a moment.
How to Regrow Green Onions in Water: Step by Step
The water method is the classic kitchen version, and it’s the one most people search for when they want to regrow green onions. It’s quick, clean and fun to watch, because you can see the roots lengthen through the glass. The trade-off is that plain water has no nutrients, so it’s best thought of as a short-term bonus crop.
Step 1: Cut the right amount
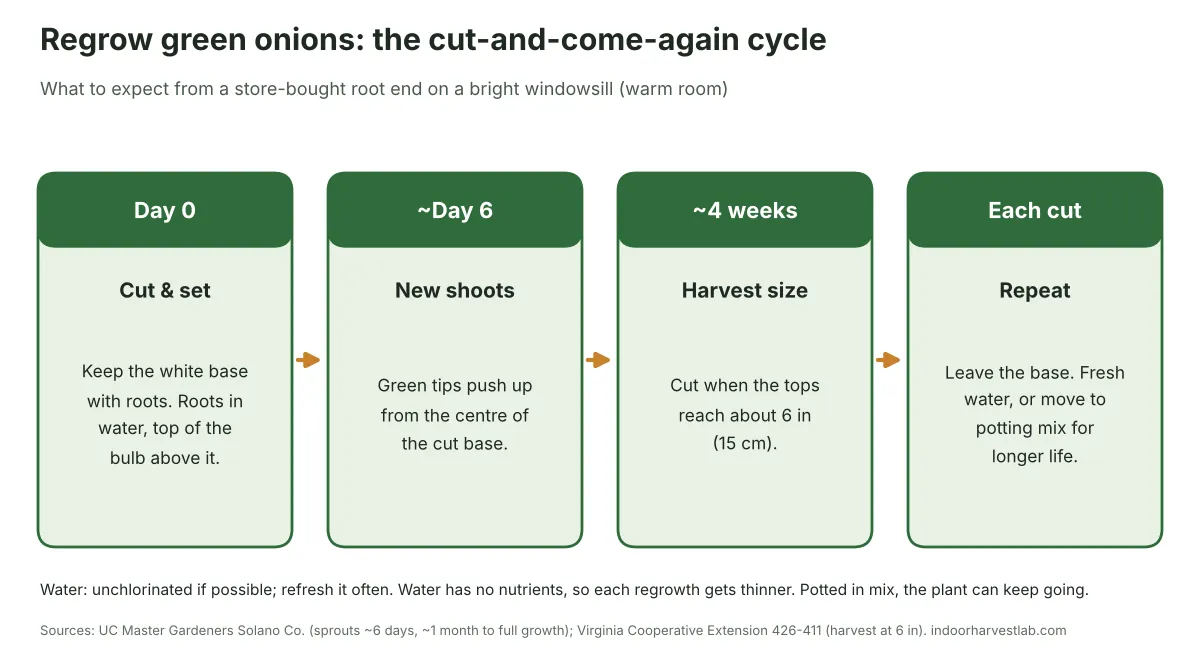
Slice off the green tops for cooking and keep the white base with its roots. A useful rule of thumb is to leave roughly 1–2 inches (2.5–5 cm) of white stem above the roots. That keeps the basal plate well protected and leaves enough stem for the onion to stand up in the glass. Cutting right down to the roots works sometimes, but there’s less stored food and less margin for rot.
Step 2: Choose a narrow container
WSU Extension recommends a narrow container so the onions stand upright. A shot glass, a small jar or a drinking glass all work. Bundle the bases loosely so they don’t fall over, but don’t pack them so tightly that water can’t circulate around the roots.
Step 3: Add just enough water
Pour in water until the roots are covered, with the top of the bulb sitting above the waterline. That’s the key detail from WSU’s guidance. Roots need water; the cut stem doesn’t need to be submerged, and a drowned stem is the first part to go soft and slimy.
If you can, use filtered water or rainwater. The UC Master Gardeners single out one caution for growing green onions in water: don’t use chlorinated water. If your mains supply uses chlorine, leaving a jug uncovered overnight lets much of it escape, though chloramine won’t leave that way. Our guide to using tap water for hydroponics explains how to check which one your water company uses.
Step 4: Give it light
Set the glass on your brightest windowsill. A south-facing window is ideal in the Northern Hemisphere; an east or west window is fine, because green onions tolerate partial shade. In late autumn and winter, short days slow everything down. A small LED grow light a few inches above the tips, on a timer for 12 hours or more a day, makes the regrowth noticeably thicker and greener. For timer settings, see our post on how many hours of light seedlings need; the same logic applies here.
Step 5: Refresh the water often
This is the step people skip, and it’s the one that decides whether your jar smells of onions or of drains. WSU advises keeping the water fresh and topped off. In practice that means swapping it every couple of days, and immediately if it turns cloudy or starts to smell. Rinse the roots gently under the tap when you do it. Fresh water carries more dissolved oxygen, and roots need oxygen just as much as they need moisture.
Step 6: Harvest with scissors, not your fingers
When the new shoots reach about 6 inches (15 cm), the height Virginia Cooperative Extension gives for harvesting green onions, snip what you need about an inch above the white base. Don’t pull the plant. The University of Illinois educator who tested this at home noted that cutting the onions regularly, even when you don’t need them, encourages new growth.
Regrow Green Onions in Soil for Longer Harvests
If you like the idea of never buying scallions again, soil is the better long-term home. The water method lives off the onion’s stored reserves; potting mix gives the plant a steady supply of nitrogen and minerals, so each new leaf can be as thick as the first. The Illinois Extension version of the hack is exactly this: a quick cut, a quick soak, then planting in soil.
Step 1: Root the bases in water first (optional)
Leave the bases in water until you see fresh white root tips, usually within about a week. This tells you which ones are alive before you commit pot space. Any that stay brown and mushy can go in the compost.
Step 2: Plant them deep enough to stand
Fill a pot with ordinary, free-draining potting mix and make holes with a pencil. Set each base so the white part is mostly buried and the cut top sits just above the surface. You can plant them close together, almost touching, because you’re growing leaves, not bulbs. Water well and let the excess drain away.
Step 3: Water and feed lightly
Water when the top half-inch of mix feels dry. Constantly wet mix invites fungus gnats; if they turn up, our fungus gnats guide explains how to break the cycle. After the first harvest, a dilute balanced liquid feed every few weeks keeps the leaves dark green. Virginia Cooperative Extension lists a soil pH of 6.2–6.5 for onions, which most bagged potting mixes already fall close to.
Water vs soil: which should you use?
| Factor | Water jar | Potting mix |
|---|---|---|
| Setup effort | Very low | Low (a pot and mix) |
| Speed of first regrowth | Fast, easy to watch | Similar once roots establish |
| Nutrients | None in plain water | Supplied by the mix and feed |
| Leaf thickness over time | Gets thinner with each cut | Stays thicker for longer |
| Number of useful harvests | A few, then the base is spent | Many; plants can keep going for months |
| Main risk | Slimy roots, smell, bacteria | Overwatering, fungus gnats |
| Best for | A quick bonus crop, kids’ projects | A steady supply all winter |
A good compromise is to start in water, where you can watch the roots, then pot them up once the first regrowth looks healthy. You get the fun of the jar and the staying power of soil.
How Many Times Can You Regrow Green Onions?
This is the most common follow-up question, and it deserves a straight answer rather than an invented number. There’s no controlled study that counts regrowth cycles from supermarket scallions. What we do know from the biology and from extension guidance lets you predict what will happen.
In plain water, each regrowth is built mainly from sugars stored in the white base. Every cut spends some of that reserve, so the second flush is usually thinner than the first, and the third thinner again. Once new leaves come up pale, narrow and floppy, the base is running on empty. That’s the time to compost it or move it into potting mix.
In soil, the picture changes. The plant can photosynthesise and take up nutrients to rebuild its reserves between cuts. Bunching onions (A. fistulosum) are perennial plants that keep making new shoots, and the Illinois Extension educator reported several weeks of regrowth “with no stopping yet”. So the honest summary is: a few cuts in water, and many in soil, as long as you leave the base intact and give it decent light.
How to get the most harvests
- Never cut into the white base. Snip at least an inch above it.
- Take only part of the plant at a time. Leaving a few leaves lets it keep photosynthesising.
- Rotate several jars or pots. Harvest one while the others recover.
- Pot up after the second water harvest if the leaves are getting thin.
- Add light in winter. Short, dull days are the main reason winter regrowth is spindly.
Troubleshooting Slimy, Yellow or Floppy Regrowth
Most problems come down to three things: stale water, too little light, or a base that’s out of reserves. Use this table to match what you see to the likely cause.
| What you see | Likely cause | What to do |
|---|---|---|
| Slimy roots or base, sour smell | Bacteria in stale, low-oxygen water; stem submerged too deep | Rinse, trim off mushy tissue, lower the water so only roots are covered, change water every 1–2 days. Compost any base that’s soft right through. |
| Cloudy water | Bacterial growth from decaying root hairs or debris | Change water now; wash the glass with hot soapy water. |
| Green film on the glass | Algae, which grow when light hits nutrient-bearing water | Use an opaque or shaded container; see our algae guide. |
| Thin, pale, floppy leaves | Too little light, or base reserves used up | Move to the brightest window or add a grow light; pot into soil. |
| Yellowing leaf tips | Older leaves dying back; no nutrients in plain water | Trim yellow tips; pot up and feed lightly. |
| No new growth after 10 days | Roots damaged or dried out in the shop; cold room | Check for firm white tissue at the base. If it’s mushy, start with a fresher bunch. |
| Tiny flies around the pot | Fungus gnats in wet potting mix | Let the top of the mix dry between waterings. |
Slimy roots in water are closely related to what hydroponic growers call root rot. If you want the deeper science of why warm, stagnant water turns roots brown, our hydroponic root rot guide covers oxygen and temperature in detail.
The food-safety habit that matters most
Green onions have a food-safety history worth knowing. In 2003, a hepatitis A outbreak linked to raw green onions at a single Pennsylvania restaurant sickened about 555 people and caused three deaths, according to the CDC’s MMWR report. The investigators noted that green onions are hard to keep free of contamination because of their complex surfaces and the amount of handling they get.
Lab research adds a twist that’s directly relevant to the jar on your windowsill. In a 2026 study, a norovirus surrogate added to the water of hydroponically grown green onions entered the roots within an hour and moved up into the stems and leaves; repeated water changes cleared it from the leaves but not completely from the roots (Jung et al., 2026). An earlier study found the same internalisation in hydroponically grown green onions, but not in soil-grown ones (Yang et al., 2018).
None of this means regrowing scallions is risky in a normal kitchen. It does mean three simple habits are worth keeping:
- Start with clean water in a clean glass, and change it often.
- Wash your hands before handling the roots, and keep the jar away from raw meat prep.
- Rinse harvested greens, and cook them when anyone in the household is vulnerable (pregnant, elderly or immunocompromised).
Keep the jar away from pets
The ASPCA lists onion as toxic to dogs, cats and horses, with signs that include vomiting and red blood cell damage. A jar of scallions at nose height on a low windowsill is an easy target for a curious cat, so keep it somewhere pets can’t reach.
From the Lab Bench
Treat a jar of regrowing scallions as a tiny, nutrient-free hydroponic system, because that’s exactly what it is. Everything we know about hydroponics applies: roots need oxygen, warm stagnant water loses oxygen and breeds bacteria, and light drives the whole operation. Once you see it that way, the rules stop feeling like folklore. Fresh water is your aeration. Keeping the stem out of the water stops the part with no roots from rotting.
Light quality research on Allium fistulosum is surprisingly rich. Studies from Shandong Agricultural University grew Welsh onions under different LED colours at the same intensity, 300 µmol/m²/s, and found white and blue light gave taller plants with more leaf area and fresh weight than monochromatic yellow, green or red (Gao et al., 2020). A follow-up found a 3:1 white-to-blue mix was best for growth and for the sulfur compounds that give onions their flavour (Gao et al., 2021). The practical takeaway for a home grower is simple: an ordinary full-spectrum white LED is a perfectly good choice. You don’t need a purple grow light.
The other lesson is about expectations. A supermarket root end is a rescued plant with a finite battery. Water lets you spend that battery; soil lets you recharge it. If you want a true cut-and-come-again supply through winter, treat the jar as a rooting station and the pot as the real garden. And if you enjoy this kind of zero-waste growing, garlic greens from sprouting cloves work on exactly the same principle, and they pair well with the other kitchen herbs in our winter herb-growing guide.
FAQ
How long does it take to regrow green onions?
New shoots usually appear within about a week. UC Master Gardeners reported sprouts within six days and full-grown plants in about a month in a warm house. Cool rooms and short winter days slow it down.
Should I regrow green onions in water or soil?
Water is quick and easy but gives a few thinner harvests, because plain water has no nutrients. Soil takes a little more setup but lets the plants keep producing thick leaves for months. Many growers root them in water first, then pot them up.
How many times can you regrow green onions?
There’s no fixed number. In water you’ll typically get a few cuts before the base runs out of stored energy and the leaves turn thin. In potting mix with decent light, the same plants can keep regrowing for months.
Why are my green onions slimy in water?
Slime usually means bacteria in stale, low-oxygen water, or a stem sitting too deep. Rinse the roots, trim off any mushy tissue, keep only the roots under water and change the water every day or two. Compost bases that are soft right through.
How often should I change the water?
Every couple of days, and straight away if it turns cloudy or smells. WSU Extension advises keeping the water fresh and topped off, and fresh water carries more oxygen for the roots.
Do green onions need sunlight to regrow?
They’ll sprout on stored energy at first, but they need light to keep growing well. Use your brightest window, or put them under a grow light for about 12 hours a day or more in winter.
Are regrown green onions safe to eat?
Yes, with normal kitchen hygiene. Use clean water and a clean glass, change the water often, wash your hands before handling them and rinse the greens before eating. Cook them for vulnerable household members.
Sources
- Schlegel, M. Regrowing Green Onions from Scraps. Under the Solano Sun, UC Master Gardeners of Solano County, University of California Agriculture and Natural Resources.
- Mellendorf, C. (2019). DIY: Regrowing Green Onions. University of Illinois Extension, Know How, Know More blog.
- University of Illinois Extension, Eat.Move.Save. Regrowing Scrap Veggies.
- Washington State University Extension, Ferry County (2024). It Doesn’t Take an Acre: Kitchen Scrap Gardening.
- Relf, D. and McDaniel, A. Onions, Garlic, and Shallots. Virginia Cooperative Extension Publication 426-411, Virginia Tech.
- Centers for Disease Control and Prevention (2003). Hepatitis A Outbreak Associated with Green Onions at a Restaurant, Monaca, Pennsylvania, 2003. MMWR 52(47): 1155–1157.
- Jung, S., Shin, H., et al. (2026). Internalization and Localization of Murine Norovirus in Hydroponically Grown Green Onion (Allium fistulosum L.). Food and Environmental Virology 18(1): 5.
- Yang, Z., Chambers, H., DiCaprio, E., et al. (2018). Internalization and dissemination of human norovirus and Tulane virus in fresh produce is plant dependent. Food Microbiology 69: 25–32.
- Gao, S., Liu, X., et al. (2020). Photosynthetic characteristics and chloroplast ultrastructure of welsh onion (Allium fistulosum L.) grown under different LED wavelengths. BMC Plant Biology 20: 78.
- Gao, S., et al. (2021). Comparison of the effects of LED light quality combination on growth and nutrient accumulation in green onion (Allium fistulosum L.). Protoplasma 258: 753–763.
- American Society for Horticultural Science (2024). Red and Blue LED Lighting Effects on Hydroponically Grown ‘Koba’ Green Onion. ASHS Annual Conference abstract (VCM 3).
- ASPCA Animal Poison Control Center. Onion (Allium cepa): toxic to dogs, cats and horses.