
You reach for the garlic and find a head that’s gone soft at the edges, with a pale green tip poking out of every clove. Most people bin it. But that green tip is a free crop waiting to happen, and you can grow garlic indoors from exactly those cloves on a sunny windowsill this winter.
Short answer: To grow garlic indoors, push individual cloves pointed-end up into a pot of moist potting mix, give them a bright window or 14–16 hours under a grow light, and keep the mix lightly moist. You’ll be cutting mild, garlicky greens in roughly 3–5 weeks. Full bulbs are a different story: they need 6–8 weeks below 40°F (4°C) plus long days, so treat indoor garlic as a greens crop first.
By the end of this guide you’ll know which cloves to use, how deep and how close to plant them, how much light and warmth they need, how to harvest so each clove gives you more than one cut, and when it’s worth attempting bulbs indoors at all.
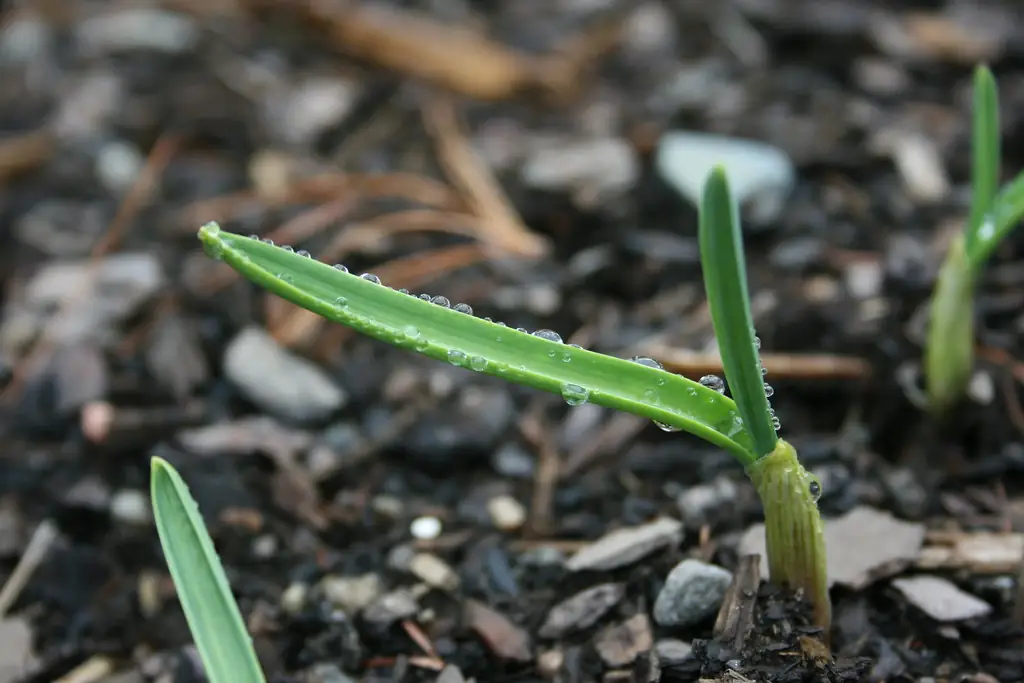
Can You Grow Garlic Indoors? Greens Yes, Bulbs Rarely
Here’s the honest bit most guides skip. Garlic has two very different harvests, and only one of them suits a living room.
The first is garlic greens: the flat, tender leaves that shoot up from a planted clove. University of Kentucky Extension describes exactly this indoor project, noting that “a bulb will not form but the green portion, the leaves, tastes garlicky and serves as a good substitute, either served raw or sautéed” (UK Cooperative Extension, 2025).
The second is a bulb, the familiar head of cloves. Bulbs need a cold spell first. University of Georgia Extension says cloves need “6–8 weeks of cool weather after planting (below 40°F)” to vernalize, and that bulb growth is “favored by long days and warm temperatures” (UGA Extension). The RHS puts it as one to two months at 0–10°C (32–50°F) (RHS). A heated home rarely drops that low for that long.
| Garlic greens | Garlic bulbs | |
|---|---|---|
| Time to first harvest | About 3–5 weeks | Months (a full outdoor season) |
| Cold period needed | None | 6–8 weeks below 40°F / 1–2 months at 0–10°C |
| Pot depth | 6 in (15 cm) or more | At least 10 in (25 cm) |
| Clove spacing | About 2 in (5 cm), close together | 6 in (15 cm) |
| Store-bought cloves OK? | Yes, fine for greens | Not recommended |
| Realistic indoors? | Very | Possible but slow and small |
So the smart plan is simple: grow garlic indoors for greens all winter, and if you want bulbs, plant hardy cloves outside in autumn, which UMN Extension times for one or two weeks after the first killing frost (University of Minnesota Extension).
How to Grow Garlic Indoors in a Pot: Step by Step
This is the method that gives the most greens for the least fuss. You’ll need a pot with drainage holes, ordinary potting mix, a saucer, and a head or two of garlic.
Step 1: Choose the right cloves
Good news first: for greens, the garlic in your kitchen works. That’s the whole appeal.
The warnings you’ll read about supermarket garlic are about bulbs. The RHS says it’s “not recommended to plant garlic bought from the supermarket” because it may suit a different climate and can carry disease (RHS). Illinois Extension adds that grocery bulbs often come from varieties suited to milder climates and their storage conditions can hurt bulb formation (Illinois Extension). None of that matters when you only want the leaves.
Why already-sprouting cloves are perfect. A clove with a green tip has broken dormancy, so it’s already halfway to your first harvest. UC Davis postharvest researchers note that loss of dormancy and sprouting occur most rapidly at intermediate storage temperatures of 41–65°F (5–18°C), which is exactly where a kitchen counter or cool pantry sits (UC Davis Postharvest Center). That’s why the forgotten head in your pantry sprouts and the one in a cold store doesn’t.
Oregon State’s Food Hero program found sprouting can take anywhere from 1 to 7 or more days, depending on how fresh the garlic is (Oregon State University Extension). Older cloves usually wake faster.
Bigger cloves, more greens. Pick the plumpest outer cloves and save the slivers from the middle for cooking. Illinois Extension notes that larger cloves generally produce larger bulbs (Illinois Extension), and the same logic applies to leaves: every bit of green grows from food stored in that clove.
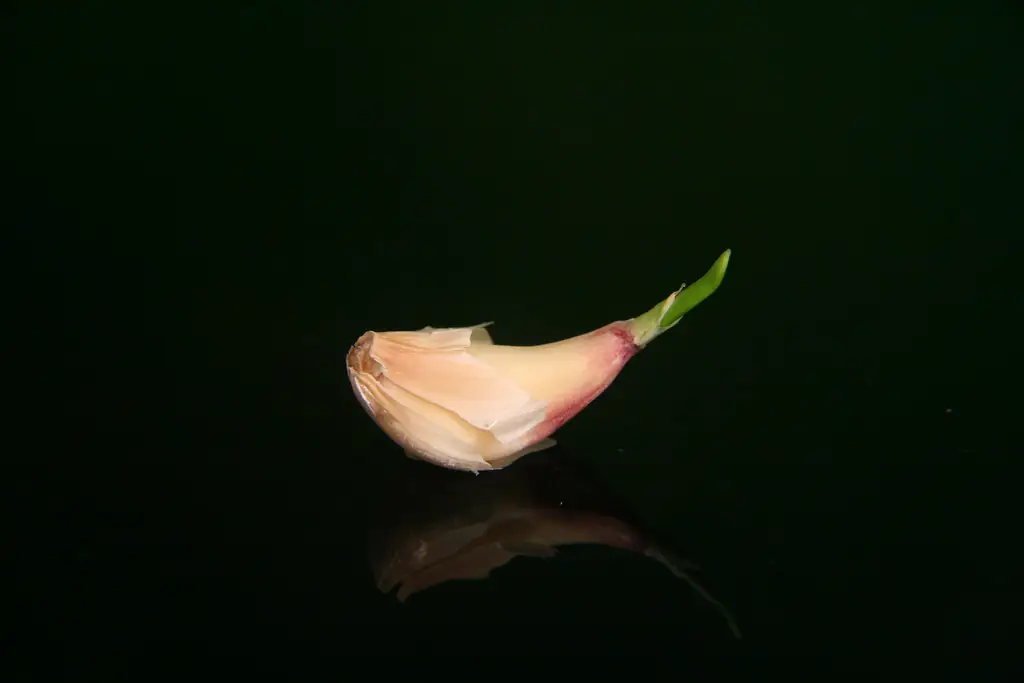
What to skip:
- Cloves that are soft, hollow, brown or mouldy at the base. They’ll rot in damp mix.
- Peeled cloves from a jar or bag. The protective papery skin is gone and they’re often treated for shelf life.
- Cloves with no root plate (the flat, hard base). Roots grow from there, so without it you get nothing.
Step 2: Pick a pot at least 6 inches deep
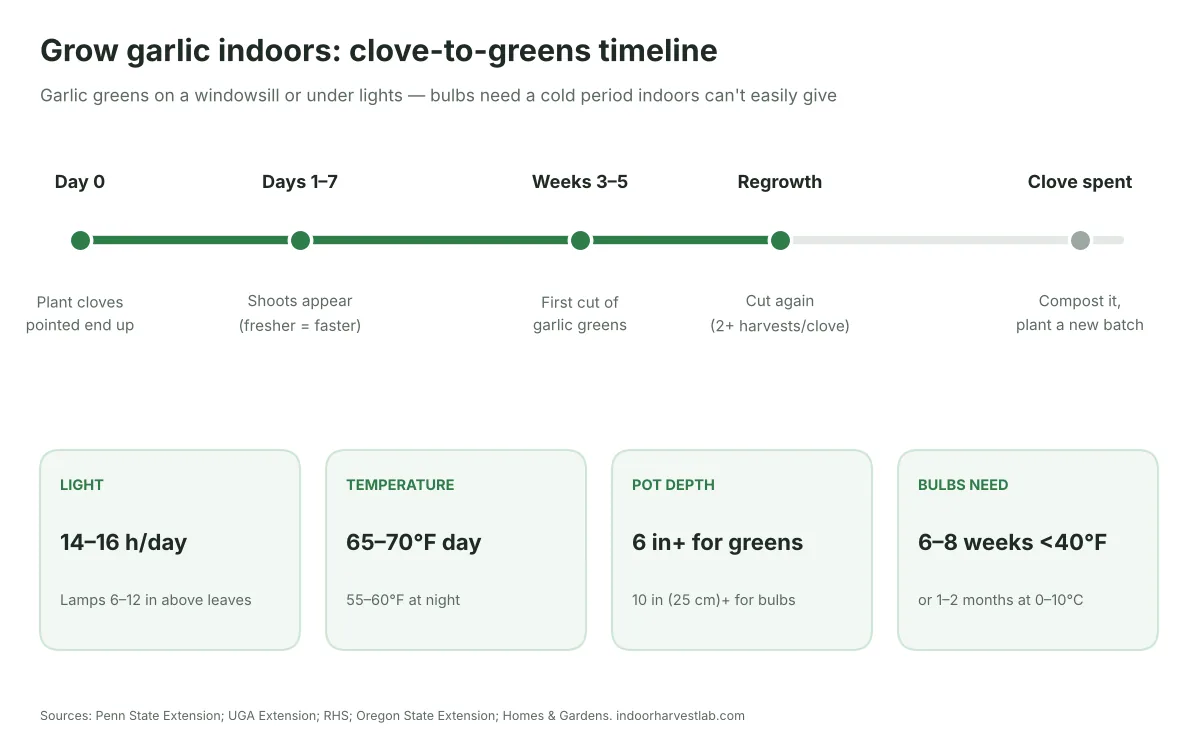
Homes & Gardens recommends a container at least 6 inches deep with drainage holes for greens (Homes & Gardens). Width matters more than depth here, because you’re packing in cloves, not growing big roots. A window box or a wide 8–10 inch pot holds a whole head.
Step 3: Fill with moist potting mix
Use a light, free-draining potting mix and dampen it before planting so it’s evenly moist, not soggy. Garden soil compacts in pots and stays wet, which is the fastest route to rotten cloves. UGA Extension puts the optimum soil pH for garlic between 6 and 7 (UGA Extension), which most bagged mixes already meet.
Step 4: Split the head, keep the skins on
Break the head into single cloves but leave the papery skins in place. Fine Gardening’s method keeps the skins on and simply pushes each clove into the mix (Fine Gardening).
Step 5: Plant pointed end up, close together
Push each clove about two-thirds of the way in, pointed end up, so the tip shows (Fine Gardening). For greens you can crowd them: about 2 inches apart works well (Homes & Gardens). You’re harvesting leaves, so there’s no need for the 6-inch spacing bulbs require.
Step 6: Water in and move to the brightest spot
Water until it runs out the bottom, empty the saucer, and set the pot in your sunniest window or under a light (details in the next section). Then keep the mix lightly moist. Shoots usually appear within a week if the cloves were already sprouting.
Step 7: Stagger your plantings
One pot runs out. Planting a fresh pot every 1–2 weeks gives you a steady supply instead of a glut and then nothing (Homes & Gardens). Two or three small pots in rotation is the sweet spot for most kitchens.
Alternative: Growing Garlic in Water (No Soil)
Growing garlic indoors in water works, for a short while. Sit a clove in a shallow glass with just the base touching water and it will root and send up a shoot. Oregon State’s Food Hero program uses exactly this jar-by-the-window trick to sprout cloves before planting them out (Oregon State University Extension).
The catch is food. Water has no nutrients, so the leaves run entirely on what’s stored in the clove. You’ll typically get one decent cut, perhaps a smaller second, and then the clove is spent. It’s a fun project with kids, and a clear jar lets you watch roots grow, much like our jar sprouts.
| Method | Best for | Harvests per clove | Main risk |
|---|---|---|---|
| Potting mix | Most homes; steady greens | At least 2 (Fine Gardening) | Rot if overwatered |
| Water only | Quick demo, kids, tiny spaces | Usually 1, maybe a small 2nd | Slimy base, cloudy water |
| Hydroponic system | If you already run one | Similar to soil if fed | Clove rot if fully submerged |
Tips for water-grown garlic:
- Only the root plate should touch water. A submerged clove rots fast.
- Change the water whenever it looks cloudy or smells off.
- Use toothpicks or a narrow shot glass to hold the clove upright.
- Move it to potting mix once roots appear if you want more than one cut.
Light, Temperature and Water: The Numbers to Hold
Garlic greens are forgiving, but they’re not shade plants, so light is the first thing to get right when you grow garlic indoors. Too little light gives you floppy, pale, stretched leaves with weak flavour. Here are the targets, pulled from extension guidance for indoor herbs and garlic.
| Factor | Target | Source |
|---|---|---|
| Window light | About 4 h direct sun for greens; 6 h is better | Homes & Gardens; Penn State Extension |
| Grow-light hours | 14–16 hours a day | Penn State Extension |
| Light distance | 6–12 in (15–30 cm) above the leaves (fluorescent tubes) | Penn State Extension |
| Day temperature | 65–70°F (18–21°C) | Penn State Extension |
| Night temperature | 55–60°F (13–16°C) | Penn State Extension |
| Mix pH | 6.0–7.0 | UGA Extension |
| Clove sprouting | Fastest at 41–65°F (5–18°C) | UC Davis |
| Feeding | Low-dose water-soluble fertilizer every 2 weeks (optional for greens) | Penn State Extension |
| Bulb cold period | 6–8 weeks below 40°F (4°C) | UGA Extension |
Getting the light right in winter
A south-facing window is your best bet from October to March. If your leaves lean hard towards the glass or flop over, they’re asking for more light. Penn State recommends 14–16 hours a day under lights kept 6–12 inches above the plants (Penn State Extension). A basic LED panel or shop light on a timer does the job. Our guide to grow light distance covers how to set the height for LEDs, which vary more than old fluorescent tubes.
Keep it cool, not cosy
Illinois Extension advises keeping indoor herbs at 70°F and below and away from direct heat (Illinois Extension). A pot sitting above a radiator dries out in a day and grows soft, thin leaves. A cool windowsill is ideal.
Watering without rot
Water when the top of the mix starts to feel dry, the same rule Penn State gives for most indoor herbs (Penn State Extension). Cloves sitting in wet mix rot from the base. Always empty the saucer, and if you see tiny black flies hopping off the surface, read our guide to fungus gnats. They love constantly damp potting mix.
Harvesting Garlic Greens So They Keep Coming Back
This is where most people who grow garlic indoors lose half their crop. They pull the whole shoot, or cut it too low, and the clove has nothing left to regrow from.
Homes & Gardens puts the first harvest at roughly 3–5 weeks (Homes & Gardens), and Fine Gardening reports you can expect at least two harvests from each clove “before the cloves are spent” (Fine Gardening).
How to cut
- Use clean scissors and snip the leaves a little above the soil, leaving a short stub so the growing point survives.
- Cut what you need for the meal rather than the whole pot at once. Leaves keep growing in the pot better than in the fridge.
- When regrowth comes back thin and pale, the clove has used up its reserves. Compost it and replant.
What garlic greens taste like and how to use them
The flavour is milder and fresher than a raw clove, closer to garlic scapes or a garlicky spring onion (Fine Gardening). Penn State Extension suggests using young garlic leaves in salads, sauces and soups (Penn State Extension). Try them snipped over eggs, stirred into noodles at the end, or blended into a quick green sauce.
Do sprouted cloves lose their value?
Not as much as you’d think. In a lab study, extracts from garlic sprouted for 5 days showed the highest antioxidant activity of the samples tested, higher than raw unsprouted garlic (Zakarova et al., 2014). That was measured in test tubes, not people, so don’t read it as a health claim. But it’s a good reason not to throw sprouted heads away.
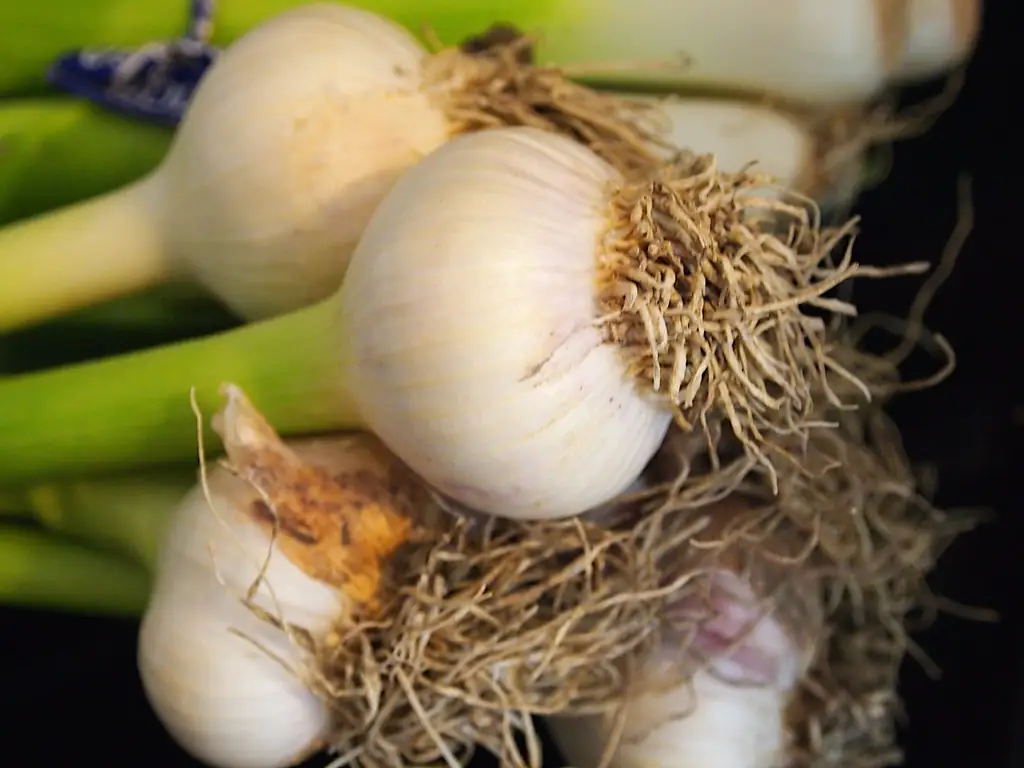
Troubleshooting Indoor Garlic: Symptoms and Fixes
When you grow garlic indoors, most problems come back to three things: too little light, too much water, or a clove that was past it before you planted it. Match what you see to the likely cause.
| What you see | Likely cause | What to do |
|---|---|---|
| Long, pale, floppy leaves | Not enough light | Move to a south window or run lights 14–16 h, 6–12 in above |
| Clove soft, smelly or mouldy at the base | Overwatering, poor drainage | Remove it, let mix dry between waterings, empty saucers |
| No shoot after 2–3 weeks | Dormant or dead clove | Use cloves already showing a green tip; check the root plate is firm |
| Tiny black flies around the pot | Fungus gnats in wet mix | Let the surface dry; see our fungus gnat guide |
| Leaf tips dry and brown | Dry air near a heater, or irregular watering | Move away from heat sources; water more evenly |
| Weak, thin regrowth after cutting | Clove reserves used up | Compost and replant; stagger new pots |
| Leaves yellow from the tips over many weeks | Normal ageing of a spent clove | Harvest what’s left and start fresh |
One safety note for pet owners: the ASPCA lists garlic as toxic to dogs, cats and horses, with effects that include breakdown of red blood cells (ASPCA). Keep pots out of reach of nibbling pets.
Can You Grow Garlic Bulbs Indoors? A Realistic Plan
If you’re set on trying to grow garlic indoors all the way to bulbs, you can, but go in with clear eyes. The two triggers are cold and long days, and you’ll have to fake both.
Step 1: Start with good seed garlic
Buy named seed garlic from a garden supplier, as both the RHS and UMN Extension advise against supermarket bulbs for bulb production (RHS; UMN Extension).
Step 2: Give the cloves their cold period
Cloves need 6–8 weeks below 40°F (4°C) (UGA Extension). A refrigerator is the usual home stand-in. Note that storage around 30–32°F (−1–0°C) at 60–70% humidity keeps garlic dormant, while 41–65°F encourages sprouting (UC Davis), so a cold fridge holds them steady while they chill.
Step 3: Plant deep, space wide
Use a pot at least 10 inches (25 cm) deep, plant with the tip about 1 inch (2.5 cm) below the surface, and space cloves 6 inches (15 cm) apart (RHS). A wide trough holds a handful.
Step 4: Long days, and don’t cut the leaves
Bulbing is favoured by long days and warm temperatures (UGA Extension), so keep the pot in your brightest spot or on a long light schedule. And don’t harvest the greens: Penn State notes the plant needs its leaves to build a bulb, so grow separate plants if you want greens too (Penn State Extension).
Even done well, expect smaller heads than garden garlic. For most indoor growers, the greens are the real prize.
From the Lab Bench: Why Garlic Greens Work So Well Indoors
Why is it so easy to grow garlic indoors for greens? Think of a garlic clove as a packed lunch. It isn’t a seed; it’s a swollen leaf base stuffed with stored carbohydrate, built to feed a new plant through its first weeks. That’s why garlic greens are so easy indoors. For the first cut, the plant barely needs your light or fertilizer at all. It’s spending savings.
That also explains the limits. Once those savings run low, regrowth depends on photosynthesis, and a dim winter windowsill can’t pay the bills. This is why the second cut is usually thinner than the first, and why water-only garlic fades fastest: no nutrients, and no stored reserves left to call on. A sensible rule of thumb follows: bigger cloves, more light, and fresh replanting beat feeding. Fertilizer earns its place only if you’re keeping plants going for weeks or trying for bulbs.
The bulb question is pure physiology. Garlic uses winter cold as a calendar, and only after that signal does lengthening daylight tell it to swell. Your living room gives it neither a winter nor a spring, so it just keeps making leaves. That’s not failure; it’s exactly what you want from a greens crop. Pair a pot of garlic with other low-fuss winter herbs from our guide to growing herbs indoors in winter, and you’ve got fresh flavour on the counter until spring.
If you enjoy this kind of root-and-clove project, growing ginger indoors from store-bought root uses the same storage-organ logic, while indoor rosemary is a good longer-term partner on the same sunny sill. Browse more in our indoor herbs section.
FAQ
How long does it take to grow garlic indoors?
Garlic greens are usually ready to cut in about 3–5 weeks, and sprouted cloves can show shoots within a week. Full bulbs take months and need 6–8 weeks below 40°F (4°C) first, which is why most indoor growers stick to greens.
Can I grow garlic from a store-bought clove?
Yes, for greens. Supermarket cloves sprout and produce tasty leaves. For bulbs, the RHS and university extensions recommend buying seed garlic, because supermarket varieties may not suit your climate and can carry disease.
Can you grow garlic indoors in water?
You can sprout a clove in a shallow glass with only its base in water. It will give you one cut of greens, maybe a small second, because water contains no nutrients. Move it to potting mix for more harvests.
How much light does garlic need indoors?
Aim for at least 4 hours of direct sun for greens, and more if you can. Under a grow light, run 14–16 hours a day with the light 6–12 inches above the leaves.
How many times can you cut garlic greens?
Expect at least two harvests per clove. Leave a short stub when cutting, and replace the clove once the regrowth turns thin and pale.
Will garlic grown indoors form a bulb?
Usually not. Garlic needs a cold period of 6–8 weeks below 40°F, followed by long days, to form a bulb. You can pre-chill cloves in a fridge and plant them in a deep pot, but expect small heads.
Is indoor garlic safe around pets?
Keep it out of reach. The ASPCA lists garlic as toxic to dogs, cats and horses.
Sources
- Penn State Extension. Growing Herbs Indoors.
- Penn State Extension. Growing and Using Garlic.
- University of Georgia Cooperative Extension. Garlic Production for the Gardener (Circular 854).
- Royal Horticultural Society. How to grow garlic.
- UC Davis Postharvest Research and Extension Center. Garlic: Produce Facts.
- University of Minnesota Extension. Growing garlic in home gardens.
- University of Illinois Extension. Garlic (Herb Gardening).
- University of Illinois Extension. Grow Herbs and Lettuce Indoors this Winter (2017).
- Heisdorffer, A. M. (2025). Continue Gardening Indoors during the Winter. University of Kentucky Cooperative Extension, Daviess County.
- Oregon State University Extension, Food Hero. Spring Garlic (sprouting garlic indoors).
- Zakarova, A., Seo, J. Y., Kim, H. Y., et al. (2014). Garlic sprouting is associated with increased antioxidant activity and concomitant changes in the metabolite profile. Journal of Agricultural and Food Chemistry, 62(8), 1875–1880.
- ASPCA Animal Poison Control. Garlic.
- Fine Gardening. Indoor Gardening with Garlic Greens.
- Homes & Gardens. How to grow garlic indoors.