
A spoonful of seed, a jam jar and a piece of mesh: that is the whole setup. Four or five days later the same jar holds a tangle of crisp, fresh sprouts you grew on the kitchen counter with no soil, no grow light and no special equipment. So why do so many first jars turn slimy or sour? It is the fastest crop you will ever grow, and the one where beginners trip over the same few steps.
Short answer: To grow sprouts in a jar you need sprouting seed, cool water, a wide-mouth jar and a mesh lid. Soak 2 to 4 tablespoons of seed, 4 hours for alfalfa or overnight for beans, lentils and peas, then rinse and drain at least every 12 hours with the jar resting tilted, mouth down. Most sprouts are ready to eat in 3 to 7 days.
Because sprouts are a higher-risk food, the University of California recommends treating seed for 5 minutes in 3% hydrogen peroxide heated to 140 °F (60 °C) before soaking, and Virginia Tech recommends rinsing every 6 hours in warm rooms, refrigerating finished sprouts at 40 °F (4.4 °C) or below, and eating them within 4 to 6 days.
Jar sprouting is the cheapest way into indoor food growing: no soil, no lights, no pump. This guide covers how to grow sprouts in a jar from seed to fridge, with soak times by crop, the rinsing rhythm that keeps sprouts crisp, and the safety steps most blogs skip.
Table of Contents
Sprouts vs microgreens: what is the difference
Sprouts and microgreens come from the same seeds but are different crops. A sprout is germinated in water and eaten whole, seed, root and shoot, within a week. A microgreen grows on a medium under light and is cut above the roots after 6 to 21 days. The honest comparison:
| Sprouts in a jar | Microgreens | |
|---|---|---|
| Days to harvest | 3 to 7 | 6 to 21 |
| Grown in | Water only, in a jar | Soil, coco or a grow mat |
| Part eaten | Whole seedling: seed, root, shoot | Stem and leaves, cut above the mix |
| Light needed | None, except 1 to 2 days of greening for leafy types | Yes, daily light integral of roughly 9 to 16 mol/m²/day |
| Equipment cost | A jar and a mesh lid | Trays, medium, usually a grow light |
| Food-safety risk | Higher: the root is eaten and the jar stays warm and wet | Lower: the root zone is not eaten |
Sources: Virginia Cooperative Extension FST-344 for sprout handling and timing; our microgreens light requirements guide for DLI targets.
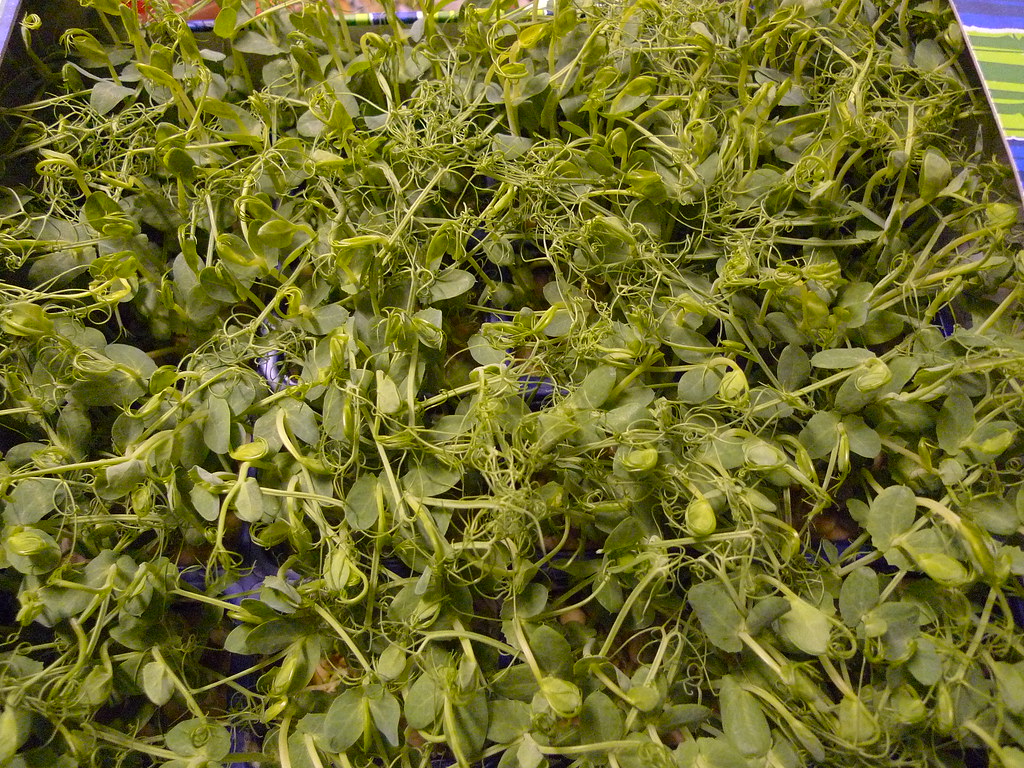
The reason sprouts need no light math is simple: you harvest before the seedling depends on photosynthesis, living off the seed’s reserves. Pea shoots sit between the two: grown from soaked seed like a sprout, then grown on for leaves like a microgreen.
One nutritional note that sends many people to jar sprouting: three-day-old broccoli sprouts contain 20 to 50 times the glucoraphanin, the precursor of sulforaphane, found in mature broccoli heads, according to a 1997 Johns Hopkins University announcement. That is a comparison of one plant compound, not a medical claim, but it explains broccoli’s popularity as a sprouting seed. For most beginners that is reason enough to grow sprouts in a jar of broccoli seed first.
What you need to grow sprouts in a jar
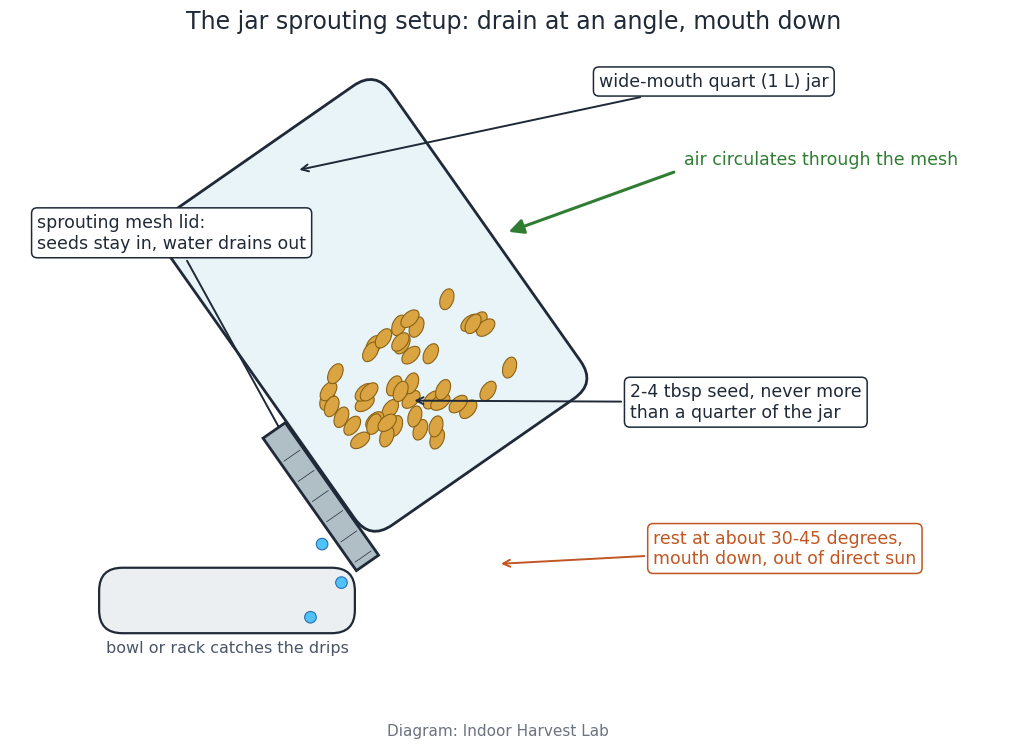
- A wide-mouth quart (1 litre) jar. Wide mouths drain better and make de-hulling easier. Two jars let you stagger batches.
- A sprouting lid. A plastic or stainless mesh lid that screws onto the ring. Cheesecloth held by the jar ring works but clogs faster.
- Sprouting seed. Buy seed sold for sprouting and, ideally, certified pathogen-tested. The University of California notes that organic seed is not automatically pathogen-free, and certification has to be requested because seed is not always labelled (UC ANR Publication 8151). Never sprout seed treated for field planting.
- Cool potable water, a bowl or dish rack to hold the tilted jar, and for the safety steps: 3% hydrogen peroxide (the drugstore strength), a cooking thermometer, and plain bleach for sanitizing between batches.
How to grow sprouts in a jar: step by step
The full routine below shows how to grow sprouts in a jar safely, built on University of California and Virginia Tech guidance. Plan on 3 to 7 days by seed.
Step 1: Treat the seed (5 minutes)
This is the UC Davis step that most tutorials on how to grow sprouts in a jar leave out, and it matters because contaminated seed, not dirty kitchens, caused most sprout outbreaks. Heat 3% hydrogen peroxide to 140 °F (60 °C), put the seed in a small mesh strainer, and immerse it for 5 minutes, swirling once a minute. Use a thermometer and hold the temperature steady. Discard the peroxide after each batch (UC ANR Publication 8151).
Then rinse the seed under running tap water for 1 minute, cover with water plus an inch, and skim off everything that floats. Research has tied most seed contamination to floating seed and seed-coat fragments, so this tedious step pulls real weight.
Step 2: Soak
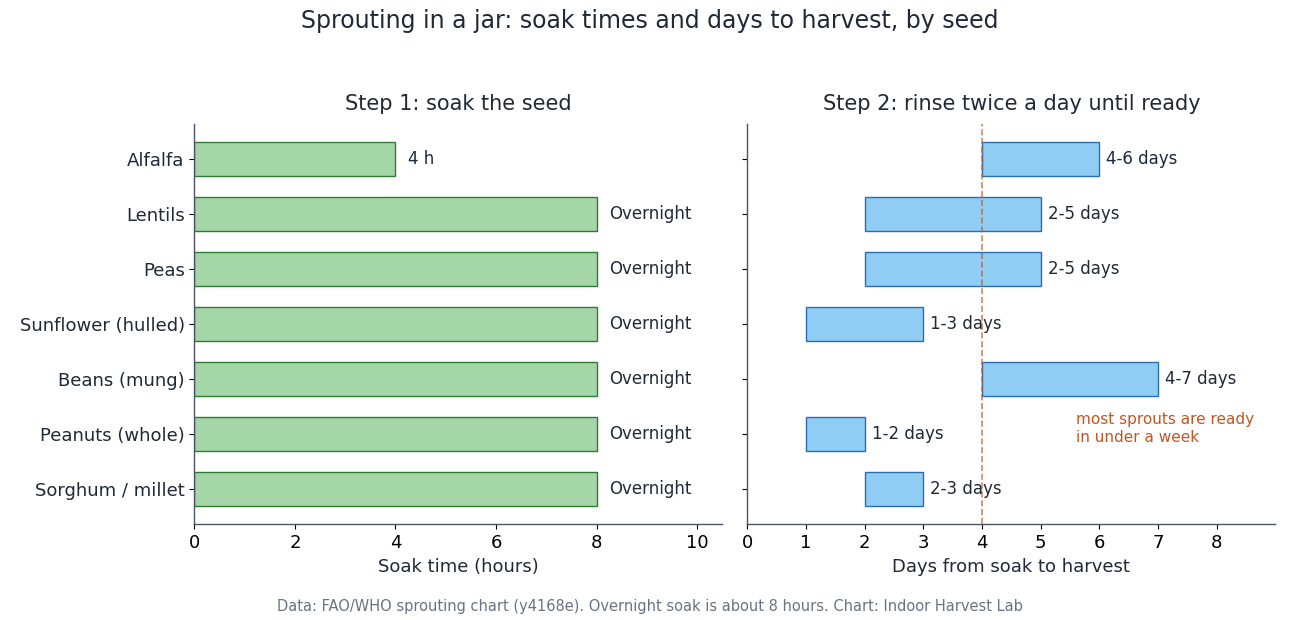
Put the treated, rinsed seed in the jar and cover with several times its volume of cool water. Use 2 to 4 tablespoons of small seed per quart jar; the FAO/WHO sprouting chart allows up to 1 cup of large seed like beans and peas (FAO/WHO sprouting chart). Soak alfalfa for 4 hours; soak beans, lentils, peas and other large seed overnight, about 8 hours. Never fill the jar more than a quarter with dry seed, because seed swells several times in volume.
Step 3: Rinse and drain, at least every 12 hours
Drain the soak water through the mesh, fill with cool water, swirl, and drain again. Then rest the jar tilted, mouth down, so drainage and airflow continue. Repeat this rinse at least every 12 hours. If you will eat the sprouts raw and your room is warm, rinse every 6 hours, per Virginia Cooperative Extension. Keep the jar out of direct sun; a kitchen counter is ideal.
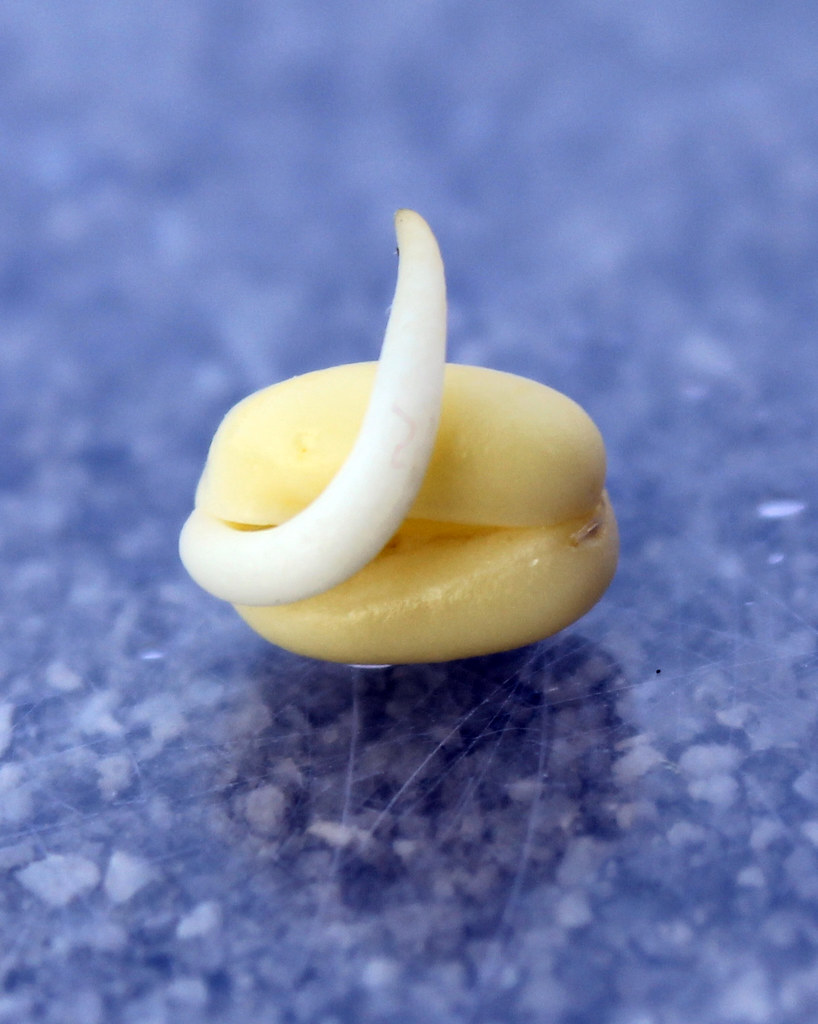
Within a day or two the white root, the radicle, pushes out of each seed. That is the sprout starting, and it is the whole point of the method. This sink-side rhythm is what makes it easy to grow sprouts in a jar: two minutes, morning and evening.
Step 4: Green up (optional, 1 to 2 days)
Alfalfa, broccoli, clover, radish and other leafy sprouts taste better after greening. Once the sprouts fill the jar and small leaves have opened, move the jar to bright indirect light, never direct sun, for 1 to 2 days while keeping up the rinsing. Bean and lentil sprouts are usually eaten white, straight from the dark jar.
Step 5: De-hull, dry and refrigerate
For leafy sprouts, fill a bowl with cool water, tip in the sprouts, and swirl: the hulls float or sink and the sprouts stay mid-water. Skim, drain, then dry the sprouts well, because wet sprouts spoil fast. Spread them on a clean towel or spin them in a salad spinner lined with paper. Refrigerate at 40 °F (4.4 °C) or below in a clean container and use within 4 to 6 days, per Virginia Cooperative Extension. Grow small batches often rather than one big batch. That is the full cycle to grow sprouts in a jar, from seed to fridge.
Soak and sprouting times by seed
Timing is the part of how to grow sprouts in a jar that varies most by seed. Times and seed amounts per jar, from the FAO/WHO home sprouting chart:
| Seed | Seed per quart jar | Soak | Ready in |
|---|---|---|---|
| Alfalfa | 3 to 4 tbsp | 4 hours | 4 to 6 days, when green leaves open |
| Lentils | 1 cup | Overnight (about 8 hours) | 2 to 5 days |
| Peas | 1 cup | Overnight | 2 to 5 days |
| Sunflower, hulled | 1 cup | Overnight | 1 to 3 days |
| Beans (mung and others) | 1 cup | Overnight | 4 to 7 days |
| Peanuts, whole | 1 cup | Overnight | 1 to 2 days |
| Sorghum or millet | 1 cup | Overnight | 2 to 3 days |
Source: FAO/WHO, Living Well with HIV/AIDS, Annex 1 sprouting chart. Warm rooms shorten these times; cool rooms lengthen them.
For broccoli and other small brassica seed, follow the soak time on your seed packet. Suppliers’ recommendations vary widely, and short soaks of 4 to 8 hours are the common working range. Broccoli sprouts are typically ready in 4 to 6 days, like alfalfa.
Sprout food safety: the part most blogs skip
Sprouts have a real history as an outbreak food, and anyone learning how to grow sprouts in a jar should know the numbers. Between 2006 and July 2019, US officials recorded 14 sprout-related outbreaks with 504 illnesses, 118 hospitalizations and 2 deaths; 10 of the 14 involved Salmonella (Virginia Cooperative Extension, citing CDC data). The sprouting jar is warm, wet and nutrient-rich, which is exactly what bacteria want: a CDC-published review notes that pathogens can multiply past 10 million cells per gram during sprouting without changing how the sprouts look or smell.
Three facts should shape your routine:
- The seed is usually the source. In most outbreaks, contamination arrived on the seed, then multiplied during sprouting. That is why certified seed plus the UC peroxide treatment is the foundation of safe home sprouting.
- Home-grown is not automatically safer. A home grower runs the same risk as a commercial grower, because the risk lives in the seed, not the scale, as the University of Connecticut’s food safety program puts it.
- Some people should not eat raw sprouts at all. FDA advice, quoted by UConn, is that children, older adults, pregnant women and anyone with a weakened immune system should avoid raw sprouts of any kind. Cooking sprouts until steaming hot, above 165 °F (74 °C), makes them safe for everyone (UC ANR Publication 8151).
Commercial producers can use far stronger seed treatments, around 20,000 ppm chlorine, and even those cannot guarantee pathogen-free sprouts, according to the CDC review. At home, certified seed, the peroxide treatment, sanitized jars, frequent rinsing and prompt refrigeration are your whole defense. Use all of them.
Troubleshooting: slimy, sour, fuzzy or slow
- Slimy sprouts. Almost always poor drainage or skipped rinses. The jar must rest tilted so no water pools. If slime has set in with a sour smell, discard the batch, wash the jar with hot soapy water, and sanitize before starting over: 3 tablespoons of plain bleach per quart of water, soak at least 5 minutes, then rinse (UC ANR Publication 8151).
- Sour or musty smell. Fresh sprouts smell green and clean. Any sour, fishy or musty odor means the batch is done; do not taste-test it.
- White fuzz on the roots. Usually root hairs, not mold. Root hairs are even, silky and fade after rinsing; mold looks patchy or cobwebby and often smells musty. Our mold vs root hairs guide walks through the identification in detail.
- Slow or patchy germination. Cold rooms slow sprouting; aim for room temperature. Test old seed with the paper towel germination method before committing a whole jar.

What not to do
Most failures in how to grow sprouts in a jar come from six avoidable mistakes:
- Do not skip the seed treatment. Five minutes in heated peroxide is the only kill step available to a home grower.
- Do not crowd the jar. More than a quarter full of dry seed means poor drainage and slimy sprouts.
- Do not let the jar sit flat. Standing water is the number one cause of failed, smelly batches.
- Do not sprout seed sold for planting in soil; it may carry field-applied treatments.
- Do not eat sprouts that are slimy, sour or musty, and do not serve raw sprouts to anyone in a high-risk group.
- Do not store sprouts wet, and do not keep them past 4 to 6 days in the fridge.
Where this applies
The method for how to grow sprouts in a jar described here assumes a normal kitchen at room temperature with potable tap water, and it works year-round indoors. In hot weather or warm climates, use the stricter end of the guidance: rinse every 6 hours if the sprouts will be eaten raw, and keep the jar on the coolest counter you have, because warmth speeds both sprouting and bacterial growth. The FDA and CDC guidance quoted here is US advice; elsewhere, check your local food-safety authority. If your tap water is not drinkable, do not sprout in it.
FAQ
How long does it take to grow sprouts in a jar? 3 to 7 days for most seed. Hulled sunflower and peanuts can be ready in 1 to 3 days; mung beans take 4 to 7; alfalfa and broccoli take 4 to 6.
Do you have to soak sprouting seeds first? Yes. Soaking starts germination. Alfalfa needs only 4 hours; large seed like beans, peas and lentils needs an overnight soak of about 8 hours.
Why are my sprouts slimy and smelly? Poor drainage or missed rinses. The jar must drain mouth-down between rinses, at least every 12 hours, every 6 in warm rooms. A slimy, sour batch should be discarded, not rinsed and eaten.
Is the white fuzz on my sprouts mold? Usually not. Even, silky fuzz on the roots is root hairs and is normal. Patchy, cobwebby growth with a musty smell is mold; throw that batch out.
Are home-grown sprouts safer than store-bought? No. The University of Connecticut is blunt: a home grower runs the same risk, because contamination usually arrives on the seed. Certified seed, the peroxide treatment and strict hygiene are what lower the risk, wherever the sprouts are grown.
Do sprouts need light to grow? No. Sprouts grow in the dark on the seed’s reserves. Give leafy types like alfalfa and broccoli 1 to 2 days of bright indirect light at the end only if you want them green.
That is the whole method: treat, soak, rinse twice a day, dry, refrigerate. Once you grow sprouts in a jar a few times, a running jar takes about two minutes a day.
Related guides: How to Grow Microgreens Without Soil · Microgreens Mold vs Root Hairs · Paper Towel Germination · When and How to Harvest Microgreens · All Microgreens & Sprouts guides
Sources
- Suslow, T.V. and Harris, L.J., Growing Seed Sprouts at Home, UC ANR Publication 8151, 2004.
- Sprout Safety, Virginia Cooperative Extension FST-344, 2019.
- Taormina, P.J., Beuchat, L.R. and Slutsker, L., Infections Associated with Eating Seed Sprouts, CDC Emerging Infectious Diseases, 1999.
- Seed and Bean Sprouts, University of Connecticut, quoting FDA and FoodSafety.gov advice.
- Living Well with HIV/AIDS, FAO/WHO, Annex 1 sprouting chart, 2002.
- Sprout nutrition science references, SproutPeople, quoting the 1997 Johns Hopkins announcement of Fahey, Zhang and Talalay’s broccoli sprout research (PNAS 94:10367).
Featured image: soak-time and harvest chart, Indoor Harvest Lab.