
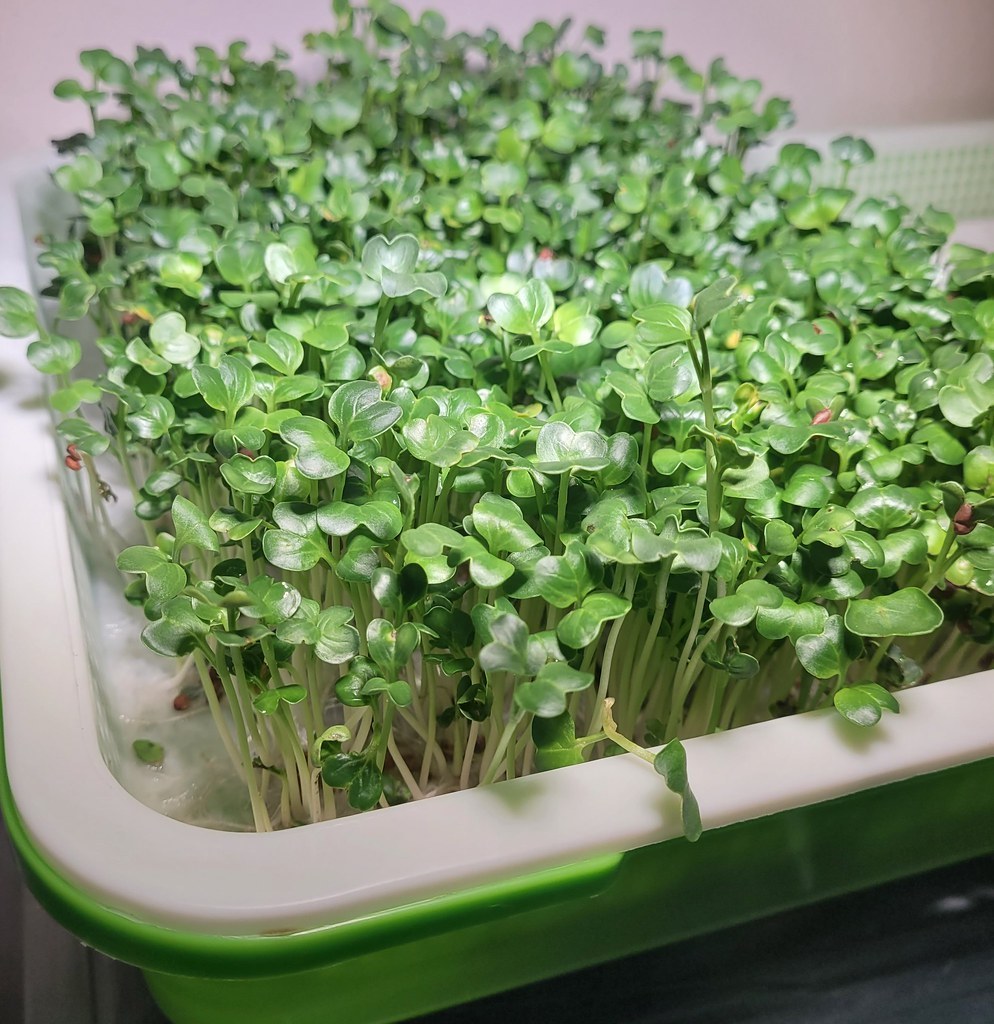
Short answer: white fuzz that hugs the roots evenly, sits just above the growing medium, and disappears for a while when you mist it is root hairs, a normal part of a healthy seedling. White or grey fuzz that looks like a cobweb, spreads across seeds, stems and the medium in patches, survives misting, and often smells musty is microgreens mold. Mold means the affected area (usually the whole tray) should not be eaten, and the next crop needs more airflow, less water and a lower seeding density.
Almost every new grower panics at the first tray of radish or broccoli covered in white fuzz. Most of the time it is harmless root hairs, not microgreens mold. This guide shows you how to tell the two apart in under a minute, what to do when it really is microgreens mold, and the growing conditions that stop it coming back.
Table of Contents
What root hairs are (and why microgreens have so many)
Root hairs are not a separate growth. Britannica describes them as tiny, filamentous extensions of epidermal cells that form near the tips of young roots. Each one is a single cell stretched into a thin tube, and together they multiply the root’s surface area so it can absorb more water and minerals.
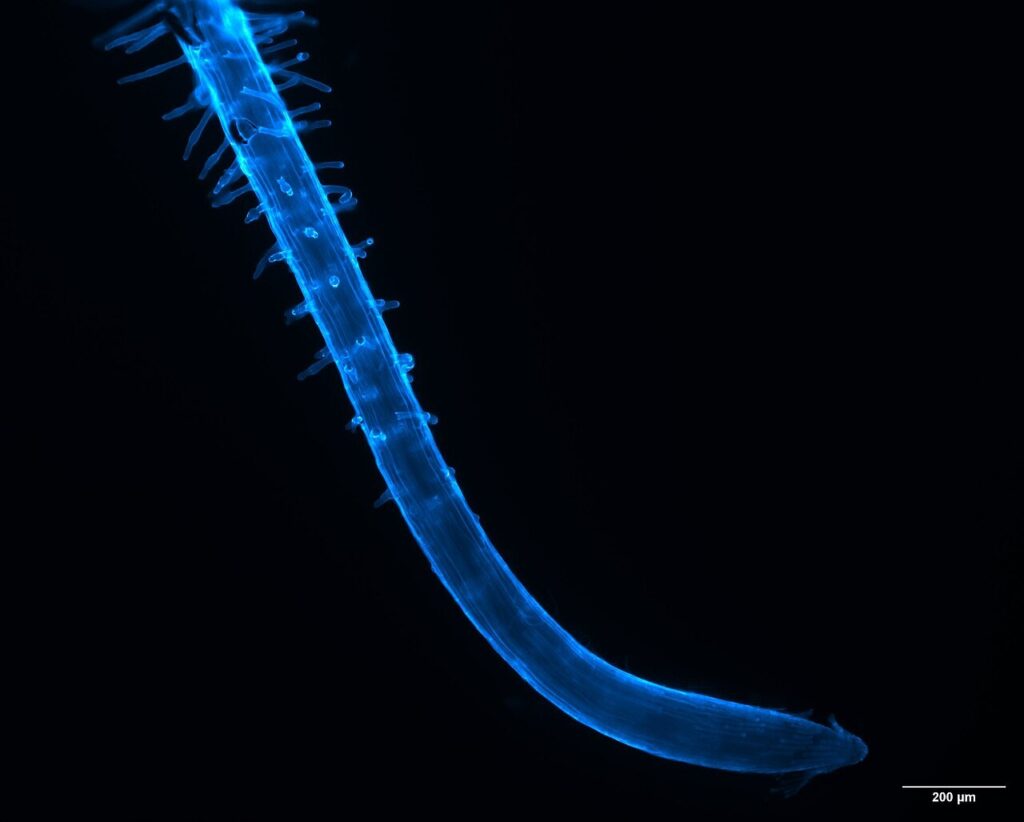
Three features make them easy to recognise on a microgreen tray:
- They grow on the roots and nowhere else. You see them as a white halo around each root, starting a short distance behind the root tip.
- They are uniform. Every root in the tray has them at about the same length, so the fuzz looks even rather than patchy.
- They are most visible when the air or medium is a little dry. Roots put out more hair when water is harder to reach. That is why a tray can look “fuzzy” in the morning and clean again right after watering.
Brassica microgreens such as radish, broccoli, cabbage, kale and mustard often show dense root hairs in the first few days, especially on seeds sown on the surface of soil or a mat, where the young roots sit exposed in the air before they reach the medium.
What microgreens mold looks like
Microgreens mold is a fungus growing on the seeds, stems or medium. It usually starts on a seed that failed to germinate, on crowded stems at the base of the canopy, or on wet spots in the medium, and spreads outward from there.
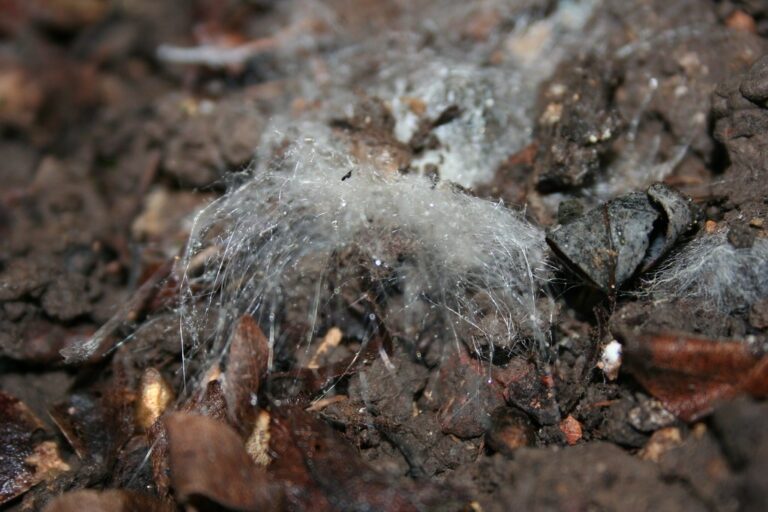
Typical signs of microgreens mold:
- Cobweb or cotton-wool threads that run between seeds and stems, not just around roots.
- Patches. It starts in one spot and grows into a circle or a streak, often where the tray stays wettest.
- Colour. White at first, sometimes turning grey, blue-green, yellow or black as it produces spores.
- Slimy or collapsed stems under the fuzz, and a musty or sour smell.
Microgreens mold vs root hairs: 4 quick tests
- The location test. Look from the side with a torch or phone light. Root hairs sit only on roots, just above the medium. If the fuzz climbs the stems, covers seed hulls or bridges between plants, it is microgreens mold.
- The mist test. Spray the fuzzy area lightly with water. Root hairs collapse against the root and seem to vanish, then reappear as the surface dries. Microgreens mold stays visible, often looking even more like a wet cobweb.
- The pattern test. Root hairs appear across the whole tray at once. Microgreens mold starts in one place and spreads over a day or two.
- The colour and smell test. Root hairs are bright white and odourless. Grey or coloured fuzz, slime, or a musty smell mean microgreens mold. Look and smell from a normal distance: the USDA advises not to sniff moldy food closely because spores can cause breathing problems.
| Feature | Root hairs (normal) | Microgreens mold (problem) |
|---|---|---|
| Where it grows | On roots only, near the medium surface | On seeds, stems, medium; spreads between plants |
| Look | Fine, even, fuzzy halo on each root | Cobweb or cotton-wool threads, uneven patches |
| After misting | Collapses and nearly disappears | Still visible |
| Colour | Bright white | White, then grey, green, yellow or black |
| Smell | None, fresh | Musty or sour |
| Plants nearby | Upright and healthy | Slimy, collapsing or dying stems |
| What to do | Nothing | Discard affected greens, change conditions |
Damping-off: the other white-fuzz problem
Sometimes the fuzz is not the main problem at all. Virginia Tech Extension notes that damping-off caused by Pythium or Phytophthora is the disease of most concern in microgreens, and that the moist growing environment also invites mildews. Damping-off rots the stem at the medium line: seedlings pinch, fall over and die in a spreading patch, sometimes with a little white growth on the stems.
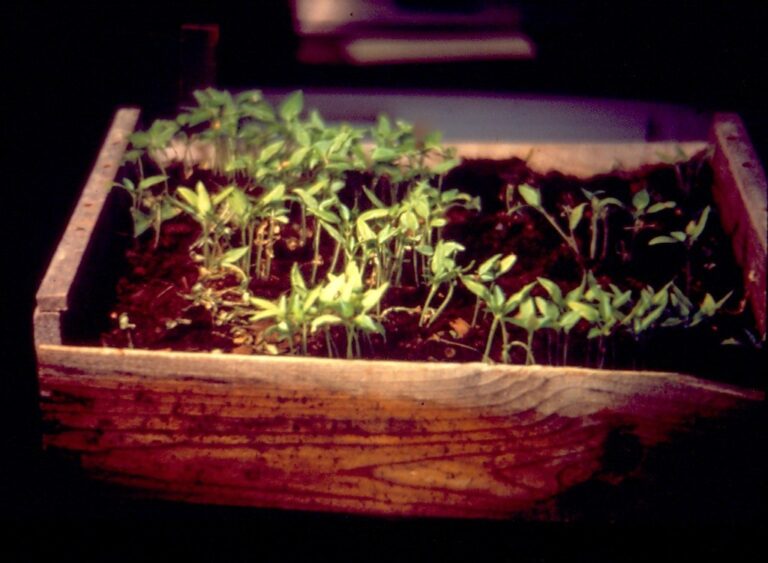
Trade reporting drawing on University of Illinois and University of Kentucky specialists lists seeding too densely and zero air circulation as the main triggers, and names watercress, Swiss chard, Thai basil, mint and nasturtium among the more susceptible microgreens. If whole patches are falling over, treat it the same way as microgreens mold: remove the tray and fix the conditions.
What to do if it is microgreens mold
- Stop watering from above. Wet foliage and a wet surface feed mold.
- Decide what to throw away. Microgreens are soft, high-moisture produce. The USDA’s guidance for soft fruits and vegetables with mold is to discard them, because mold can contaminate them below the surface. In practice, a tray with visible microgreens mold on stems or leaves should not be eaten. If the only mold is on a few unsprouted seeds at the edge and the greens above are clean, cut well above the medium and inspect closely; if in doubt, discard the tray.
- Compost or bin the medium. Do not reuse soil or mats from a moldy tray for microgreens.
- Clean the tray. Wash with detergent, then sanitize. Virginia Tech describes scrubbing equipment and using a hydrogen peroxide-based sanitizer between crops, then rinsing with water.
- Change at least two conditions for the next crop (see the prevention table below). Microgreens mold that appears once usually appears again if nothing changes.
How to prevent microgreens mold
Microgreens mold needs three things: moisture that stays on surfaces, still air, and a crowded canopy. Take away any one of them and it struggles. These are the targets extension services give for healthy microgreens:
| Factor | Target | Why it matters |
|---|---|---|
| Air temperature | 60–70°F (16–21°C) | Warm, humid rooms speed up fungal growth |
| Relative humidity | 50–70% | Above this, surfaces stay wet for hours |
| Air movement | A small fan moving air over the trays | Dries leaf and medium surfaces after watering |
| Watering | From the bottom, only when needed | Keeps stems and leaves dry |
| Seeding density | Weighed per tray, not guessed | Overcrowding traps humidity at the base |
| Blackout period | Uncover when most seeds have germinated, usually 2–5 days | Covered trays are warm, humid and still |
| Light | DLI of about 9–16 mol/m²/day | Strong, sturdy seedlings dry faster and resist rot |
Sources: Virginia Tech Extension SPES-756 (temperature, humidity, airflow, blackout, light); Penn State Extension (watering and airflow).
Penn State Extension’s step-by-step guide for growing microgreens at home makes the same points for a kitchen setup: weigh your seed for the tray size, water from the bottom and only as needed to prevent mold, and improve air circulation, even just by opening a window. Virginia Tech recommends Penn State’s microgreen seed density calculator for working out the weight of seed per tray.
Two small habits make the biggest difference at home. First, run a small clip-on fan on low for a few hours after each watering. Second, pour off any water left in the bottom tray after 15–20 minutes so the medium drains instead of sitting wet.
Seed and tray hygiene
The spores behind microgreens mold, and disease organisms, often arrive on the seed or on reused equipment. University of Arkansas food-safety researchers point to seeds and growing materials from unreliable sources, handling at harvest, contaminated water and poorly cleaned equipment as the main contamination routes for microgreens. The same advice that protects you from foodborne illness also cuts down on mold:
- Buy seed sold for sprouting or microgreens from suppliers who test their seed lots.
- Use clean drinking water for soaking and watering.
- Wash and sanitize trays, lids and weights between every crop.
- Harvest with clean scissors or a sharp knife and wash the greens in fresh drinking water before eating, as Penn State advises.
What not to do
- Do not throw out a healthy tray because of root hairs. Run the mist test first.
- Do not try to “rescue” a moldy crop for eating by spraying it or cutting around it. Spraying may hide surface growth but does not make soft produce safe.
- Do not keep trays covered after germination. A lid or blackout dome left on too long is the classic cause of microgreens mold in the first week.
- Do not top-water a dense canopy. Water sitting between stems is where mold starts.
- Do not sow thicker to get a bigger harvest. Beyond the recommended weight, extra seed mainly adds humidity and rot.
Where this applies
The temperature and humidity targets above come from North American extension services and apply to indoor growing almost anywhere, but your room is what counts. In hot, humid climates or rainy seasons, indoor humidity often stays above 70%, so a fan and a lower seeding density matter even more, and an air conditioner or dehumidifier helps. In cold climates, heated rooms in winter can be very dry: root hairs will be more obvious, and you may need to mist seeds a little more during germination.
For more on growing healthy trays, browse our microgreens growing guides and the microgreens problems section. If you want to grow lettuce without soil as well, see our guide to the Kratky method.
Microgreens mold FAQ
Is white fuzz on microgreens always mold?
No. White fuzz that is even, sits on the roots just above the medium and disappears when misted is root hairs, which are normal. Cobweb-like growth that spreads over seeds and stems, survives misting or changes colour is mold.
Can you eat microgreens with a little mold?
It is not recommended. Microgreens are soft, moist produce, and the USDA advises discarding soft fruits and vegetables with mold because contamination can reach below the surface.
Does hydrogen peroxide kill mold on microgreens?
Hydrogen peroxide-based sanitizers are used to clean trays and equipment between crops. Spraying a moldy crop may slow surface growth, but it does not make that crop safe to eat. Use peroxide to clean equipment, and fix humidity, airflow and density to prevent the next outbreak.
Why do my microgreens get mold during blackout?
Covered trays are warm, humid and have no air movement, which is ideal for microgreens mold. Uncover the tray as soon as most seeds have germinated (usually 2–5 days), water from the bottom, and make sure the seed is not sown too thickly.
Sources
- Britannica. Root hair.
- South, K. et al. (2026). Introduction to microgreen production in indoor vertical farms and greenhouses. Virginia Cooperative Extension SPES-756.
- Di Gioia, F. A step-by-step guide for growing microgreens at home. Penn State Extension.
- USDA Food Safety and Inspection Service. Molds on food: are they dangerous?
- University of Arkansas (2022). Microgreen vulnerability to pathogens characterized by researchers.
- Produce Grower (2017). Managing diseases in microgreens.
Featured image: “Tray of broccoli microgreens” by anotherdaysjourney, CC BY 2.0.